
A notched cushion is a rectangle with a rectangular bite taken out of one corner — the cutout that lets a window-seat cushion drop past baseboard trim, clear a heating pipe, or tuck in against a door jamb. It is the quiet workhorse of built-in seating: window benches, radiator shelves used as seats, reading nooks under a sill. No stock cushion has ever been made with your notch in it, which is exactly why this shape runs on made-to-measure cutting. This guide covers the four numbers that define the cutout (plus thickness), how to measure around the obstacle so the notch lands where it should, and what to do when your cutout is not a clean rectangle at all.
What Is a Notched Cushion, and Where Do You Meet One?
From above, the cushion is a rectangle with one corner missing — cut square, two straight edges meeting at a square inside corner. The shape shows up wherever built-in seating shares its space with something that refuses to move: radiator pipes rising through a corner of the window seat; baseboard, crown trim and door jambs, anywhere the seat platform meets molding thicker than the wall behind it; bay-window benches and hearth seats, where pilasters and chimney trim eat into a corner. Sectional runs meet the same problem where a block meets a wall corner — the block-by-block method is in the sectional replacement guide.
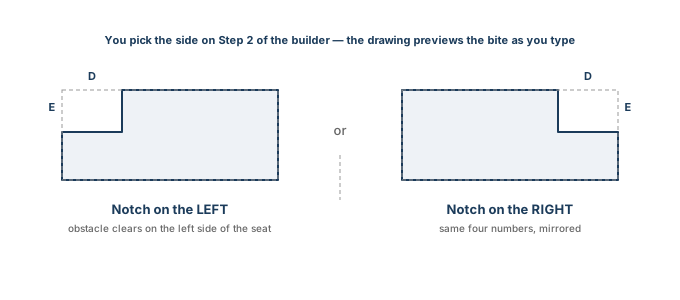
In our builder this is the Notched card — pick it on Step 1 (the sixth shape), and on Step 2 you pick which side the cutout sits on, left or right; the drawing previews the bite as you type, so a wrong-side pick is visible immediately. The card asks for five fields, labeled A, B, D, E and C on the drawing. Two describe the rectangle, two describe the bite, one is thickness.
The Four Numbers, One at a Time
The order is the whole trick of this shape: full rectangle first, then the notch. Record to the nearest 1/4″ — our cutting forms accept 1/8″ increments. The flat-measuring basics are in the complete measuring guide; everything below is specific to the corner.
A — Total Width, As If the Corner Were Solid
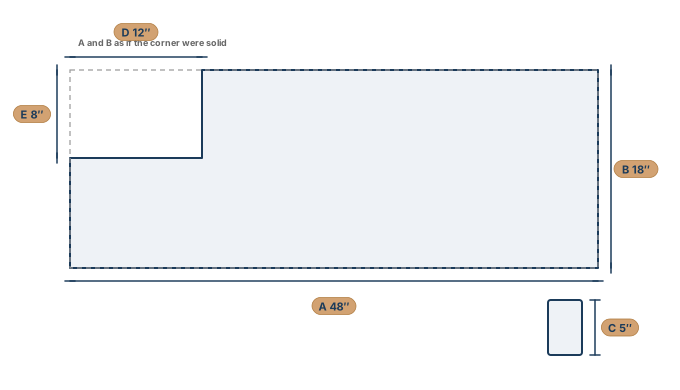
Measure the width of the full seat platform as if the obstacle did not exist — corner to corner along whichever edge is complete. The factory cuts the full rectangle first and removes the notch second, so A must describe the rectangle you would have ordered with no pipe in the room.
B — Total Depth, Same Rule
Front-to-back of that same full rectangle, at the deepest line of the seat. If trim makes an edge uneven, measure the deepest point and note the rest in the order — the review desk sorts edge irregularities before cutting.
D — Notch Width, Along the Edge
Now the bite. D is the width of the cutout measured along the edge it interrupts — from the would-be corner of the rectangle to the point where the cutout ends. Run the tape along the same line you measured A on: the notch occupies that edge, and D is its share of it.
E — Notch Depth, Into the Cushion
E is how deep the cutout reaches into the cushion, measured straight in from the edge, perpendicular to D. The inside corner of the notch sits E inches in from the rectangle’s edge. On a pipe notch, E is the pipe’s footprint measured to its outer face — the measuring rule below keeps this honest.
C — Thickness
Seam to seam if you are replacing an old cushion; the builder takes 2, 3, 5, 6 or 8″. Window seats carry a height constraint framed chairs do not: the sill. Check the clearance between seat top and sill before choosing thickness — going thicker than the old cushion is the one change most likely to fail silently here.
The Obstacle Rule: Measure the Footprint, Not the Object
The notch exists to clear something, and most remakes trace back to one shortcut: measuring the obstacle instead of the space it occupies. What the notch must clear is the obstacle’s outer face — the nearest surface the cushion could touch. For a pipe, that is the pipe’s outside edge, not its centerline and not the wall behind it. For baseboard trim, it is the face of the trim, not the plaster an inch behind it; a baseboard measured to the wall quietly steals its full thickness from the notch and the cushion will not seat. If the fit looks tight anywhere, photograph the obstacle with a tape in frame and upload it with the order — the review checks clearance before cutting.
Four Mistakes Specific to Notched Cushions
1. Measuring the shape that is left, not the rectangle that was there
The cushion on the seat is missing a corner, so its longest edge reads short — and that short number gets entered as A. The builder then cuts a smaller rectangle and takes the same notch out of it: everything shifts, nothing seats. A and B are always the full platform, as if the corner were solid.
2. Swapping D and E
Width runs along the edge; depth runs into the cushion. Entered backwards, a 12 × 8 notch becomes an 8 × 12 notch — too narrow to clear the pipe, deep enough to gut the corner. Say it out loud while writing: along the edge is D, into the cushion is E.
3. Ordering an angled cutout the card does not cut
The Notched card makes a square-cornered rectangular notch — two straight cuts meeting at a square inside corner. A 45° diagonal clip across the corner, or a rounded cut, is different geometry and cannot be forced through these four numbers. If your obstacle needs an angled or curved clearance, use the template route below instead of approximating.
4. Measuring the obstacle’s centerline
A pipe’s center is easy to eyeball; the cushion does not care about it. The notch clears the pipe’s outside edge — the nearest point of the obstacle to the cushion. Measure D and E to the outside faces, not to the middle of anything.
When the Cutout Is Not a Rectangle: The Cardboard Template
Pipes that angle, splayed risers, curved chimney corners, two obstacles sharing a corner — none of them fit four numbers, and none of them need to. The template method covers them all: lay a sheet of cardboard on the seat platform and press it into the corner; mark the outline of the seat and the outline of the obstacle directly onto the card, against its real footprint; cut the template and dry-fit it — it should lie flat, touch every edge it should touch, and clear every obstacle it should clear. Then contact us before ordering: photograph the template flat with a tape in frame, and the desk cuts one-off geometry from it as a manual spec. The card’s A, B and C still give you the instant price estimate while the template handles the corner.
A Worked Example (Window Seat With a Pipe in the Corner)
The builder’s own example numbers describe the classic case — a 48″ window seat with a heating pipe in one corner:
- A — total width: 48″
- B — total depth: 18″
- D — notch width along the edge: 12″
- E — notch depth into the cushion: 8″
- C — thickness: 5″
Read back: a 48 × 18 cushion at 5″ thick, with a 12″ stretch of one edge cut back 8″ to clear the pipe, the opposite corner left square. One notch per card — if both corners need cutouts (a pipe at one end, a jamb at the other), that is a two-notch manual spec: take all four numbers plus the second notch’s D and E, note it in the order, and the desk confirms before cutting. Window-seat sizes and frames vary more than any furniture category — the window seat page covers the scenarios.
FAQs
Do I measure D from the corner of the seat or from where the cutout starts?
From the corner. The notch is defined against the full rectangle, so D runs from the rectangle’s would-be corner along the edge — not from wherever the visible cushion happens to begin, which is exactly the short edge mistake 1 describes.
Can I get two cutouts, or a notch in each corner?
Yes, as a manual spec — the card cuts one notch per cushion. Take the card’s four numbers plus the second notch’s width and depth, note it in the order, and the review desk confirms the geometry before cutting.
How tight should the fit around the pipe be?
Measure to the pipe’s outside edge and leave the clearance to the cut sheet — snug is the goal, contact is the failure. If the numbers leave the fit looking tight, upload a photo of the obstacle with the order; every order is reviewed against photos before anything is cut.
What if a number is wrong after I order?
Contact us immediately — before cutting, corrections are free. Once foam is cut, the piece has to be remade. The review desk is the safety net: a real person replies within one business day, and made-to-order pieces ship in 4–7 business days.
Next Steps
1. Take the four numbers plus thickness — full rectangle first (A, B), then the bite (D, E), then C — and sketch the corner with the letters filled in.
2. Open the Notched card in the builder, enter the numbers, pick the left or right side on Step 2, and watch the drawing preview as you type.
3. Order with a photo of the corner. The obstacle shot is what lets the review desk confirm the notch before anything is cut — the five minutes it takes is the cheapest insurance in the made-to-measure category.
The one-sentence version: A and B describe the rectangle as if the corner were solid, D and E describe the bite — width along the edge, depth into the cushion — C is thickness, and the side is a Step 2 choice.
What Size Bed Gap Filler Do I Need? Thickness, Length and Density
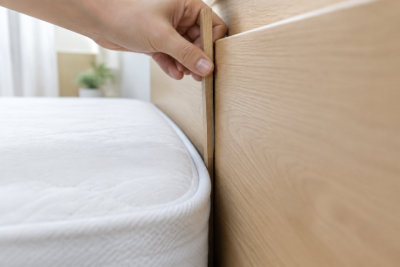
Size a bed gap filler from three measurements, not the bed’s name: thickness equals gap width plus half an inch to one, length runs the full seam, height runs platform to mattress top. Density starts at 50D.
Cushion Thickness & Seat Height: Match the Pad to the Table
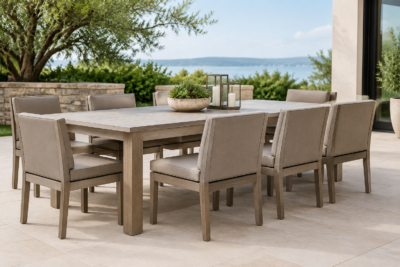
Cushion specs usually answer comfort questions. Thickness answers a geometry question: how high off the floor you end up sitting,

Church Pew Cushion Sizes: Standard Dimensions and How to Measure
Standard pew seats run 19-21 inches deep; cushions are cut 2-3 inches thick to measured runs at plus-or-minus half inch tolerance. Dimensions table, taper rules, and the pew-by-pew measuring method.
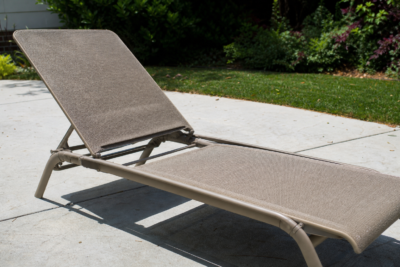
Chaise Lounge Cushion Measurements: A Complete Guide to Getting the Fit Right
How to measure a chaise lounge cushion correctly — seat depth, back height, thickness, hinge points and one-piece vs two-piece styles — with real Hampton Bay chaise dimensions.
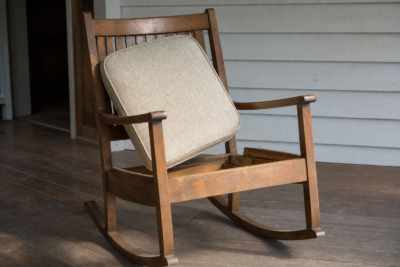
How to Measure Rocking Chair Cushions: Seats, Backs and Tie Positions
How to measure rocking chair cushions — tapered seats, curved backs, slat-gap tie maps and rock clearance — with the three-number protocol for both pieces of a rocker set.
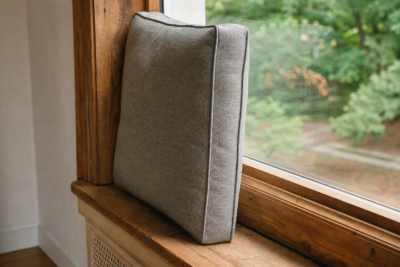
Window Seat Cushion Measurement: How to Get a Perfect Fit
Measure a window seat cushion correctly — width across alcoves, depth front to back, thickness vs sill height, radius corners and bay window angles — with tips from the cutting floor.